Capture
Capture saves a build from the world as a new schematic. You mark two corners with the remote, adjust the box, name it, and it lands in your library. From there you can place it again, upload it or export it.
Capturing a build
Section titled “Capturing a build”- Hold the remote and open the placement wheel (V). Pick Capture, the last segment. Capture mode starts with no corners set.
- Right-click a block at one corner of the area. That is corner 1.
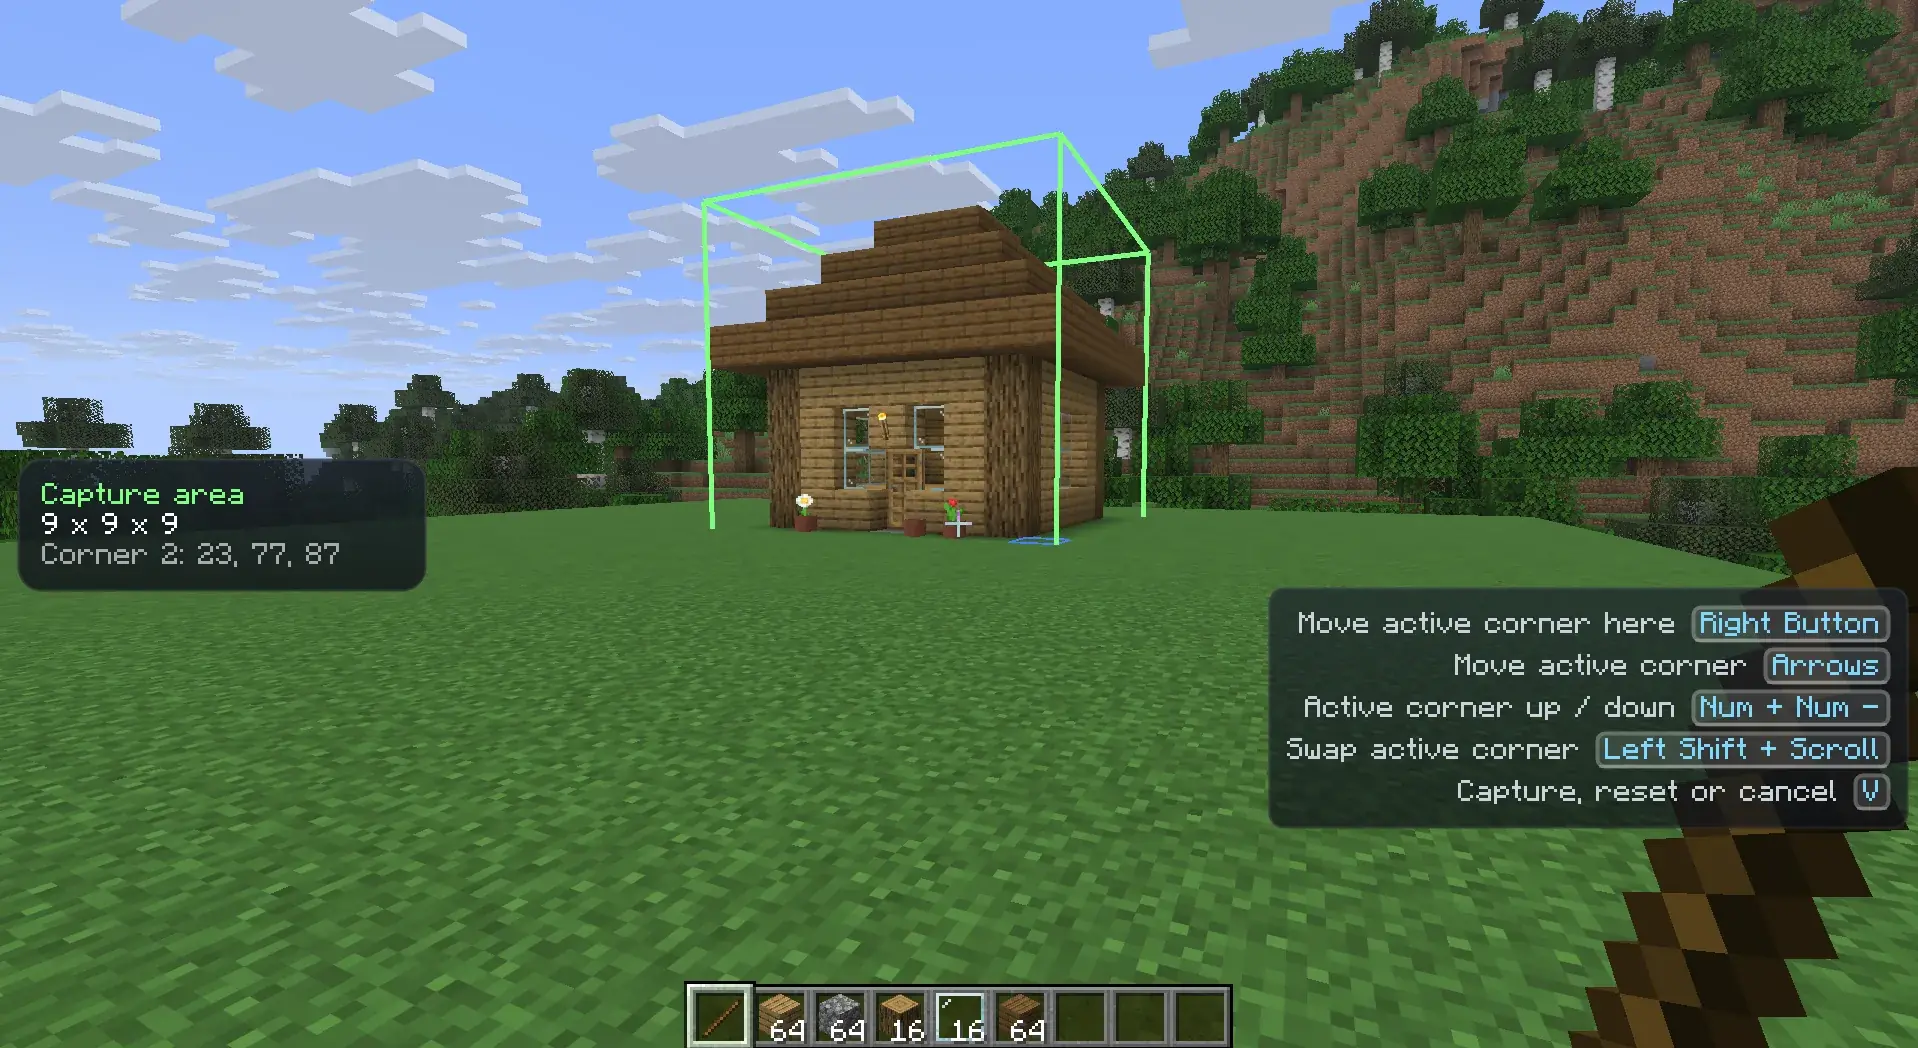
- Right-click a block at the opposite corner. That is corner 2. An outline shows the box.
- Adjust the box if needed, see below.
- Open the wheel and pick Capture.
- Enter a name and confirm.
The wheel offers Capture when no placement is selected, or when the selected placement is anchored or locked. It doesn’t show while a placement is following you.
While capture mode is on
Section titled “While capture mode is on”With the remote in hand, its keys work on the capture box instead of on placements. Your placements stay visible but
don’t move. The overlay shows the box size, such as 12 x 9 x 9, the active corner’s position and the keys you can use.
Capture mode ends when you capture, cancel, leave the world or change dimension.
The active corner
Section titled “The active corner”The corner you set last is the active corner. It is marked brighter than the other one. All adjusting moves the active corner.
To make the other corner active:
- hold Shift and scroll the mouse wheel, either direction. Your hotbar slot doesn’t change.
- or pick Swap corner on the wheel
- or press the Swap active capture corner key. It has no key by default; bind one in Options → Controls. See Keys.
Scrolling without Shift changes the hotbar slot as usual.
Adjusting the box
Section titled “Adjusting the box”| Action | Key |
|---|---|
| Move the active corner to a block | Right-click the block |
| Move it one block away, closer, left or right | Arrow keys, relative to where you face |
| Move it one block up or down | Numpad + / Numpad - |
| Move it 10 blocks | Hold Shift with any of these keys |
Hold a key to keep moving. These are the same keys that move a placement, so rebinding them changes both. The keys work from wherever you stand: press Numpad + eight times to raise the top of the box by eight blocks without climbing. A corner can’t go above or below the world’s build height.
A right-click that hits no block does nothing.
The capture wheel
Section titled “The capture wheel”In capture mode the wheel shows only these segments:
| Segment | What it does |
|---|---|
| Capture | Saves the box. Greyed out until both corners are set. |
| Swap corner | Makes the other corner active. Greyed out until both corners are set. |
| Reset | Clears both corners and stays in capture mode. |
| Cancel | Leaves capture mode. |
Naming and saving
Section titled “Naming and saving”When you pick Capture, Heavymatica asks for a name. It is filled in with Capture and the date and time, such as
Capture 2026-10-31 14:02. Change it or keep it, then confirm. Cancel brings you back to capture mode with the same box.
The capture runs without freezing the game, and the overlay shows its progress. When it is done, you see
Saved "Starter Hut" to the library. and capture mode ends.
The new entry is a local entry in .litematic format. It works without signing in.
What is saved
Section titled “What is saved”- Every block in the box, both corners included, as you see it. Air is saved as air.
- Block data such as sign text and container contents, as far as your game knows it.
- No entities, such as item frames, armor stands or animals.
- No ghosts. Only real blocks count.
Limits
Section titled “Limits”- A box can be at most 1024 blocks on each side and 16,777,216 blocks in all. A larger box shows its size in a warning colour, and Capture is refused. Your corners stay, so you can shrink the box.
- The whole box must be loaded. If part of it is beyond your render distance, Capture is refused with
Part of the box is not loaded. Move closer and try again. - If part of the box unloads while the capture runs, nothing is saved, you are told why, and the box stays.
Uploading a capture
Section titled “Uploading a capture”A capture starts as a local entry, on this computer only. To use it on other computers and keep versions, sign in, select it in the library and pick Upload. You can upload it as a new schematic or as a new version of one of your cloud schematics. A thumbnail is made and attached. See Library.
To use the capture in another tool, export it.