Your first build
This page takes you through one whole build, start to finish. Every step links to a page with the details.
You need Heavymatica installed and at least one schematic in your library. If the library is
empty, it opens on the import screen, which lists the files in your schematics folder. See
Import and export or Capture.
1. Pick a schematic
Section titled “1. Pick a schematic”- Join a world and press H to open the library.
- Click a schematic card. Its details show on the side.
- If it is a cloud schematic with several versions, pick the version you want.
- Click Place.
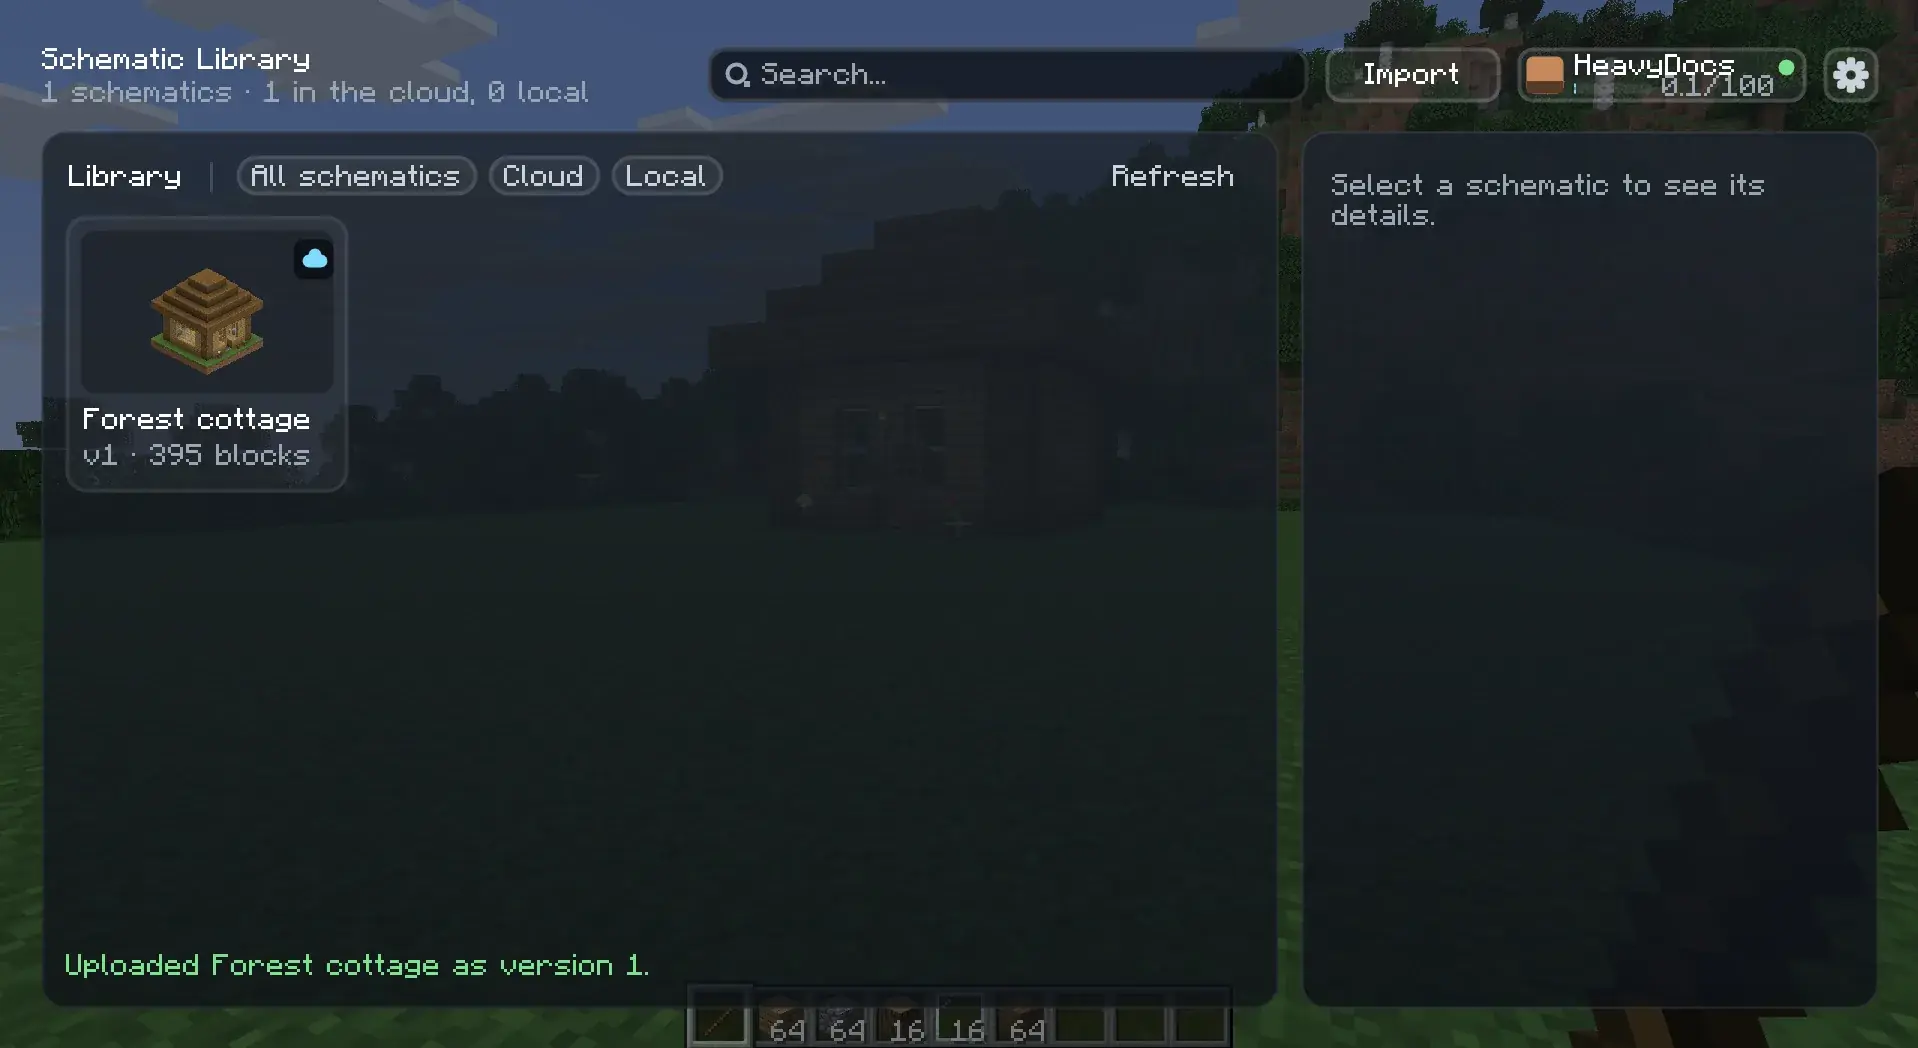
The library closes. More about the library on Library.
2. Hold the remote
Section titled “2. Hold the remote”Placements are controlled with the remote. By default that is a plain stick in your main hand. No special item is needed, so it works on any server.
If you clicked Place without the remote in your hand, a message says Hold a Stick to place. Take a stick into your
main hand and the ghost appears.
While you hold the remote, a panel on the left shows the selected placement, and the bottom-right corner lists the keys you can use right now. See The remote.
3. Put it down
Section titled “3. Put it down”The new placement is following: its ghost sits on whatever block you look at, up to 64 blocks away.
- Look at the spot where the build should stand.
- Press R to rotate it 90° (Shift + R turns the other way) and M to mirror it.
- Press Numpad + or Numpad - to raise or lower it against the block you look at.
- Right-click to anchor it. It stays there and stops following your crosshair.
4. Fine-tune the position
Section titled “4. Fine-tune the position”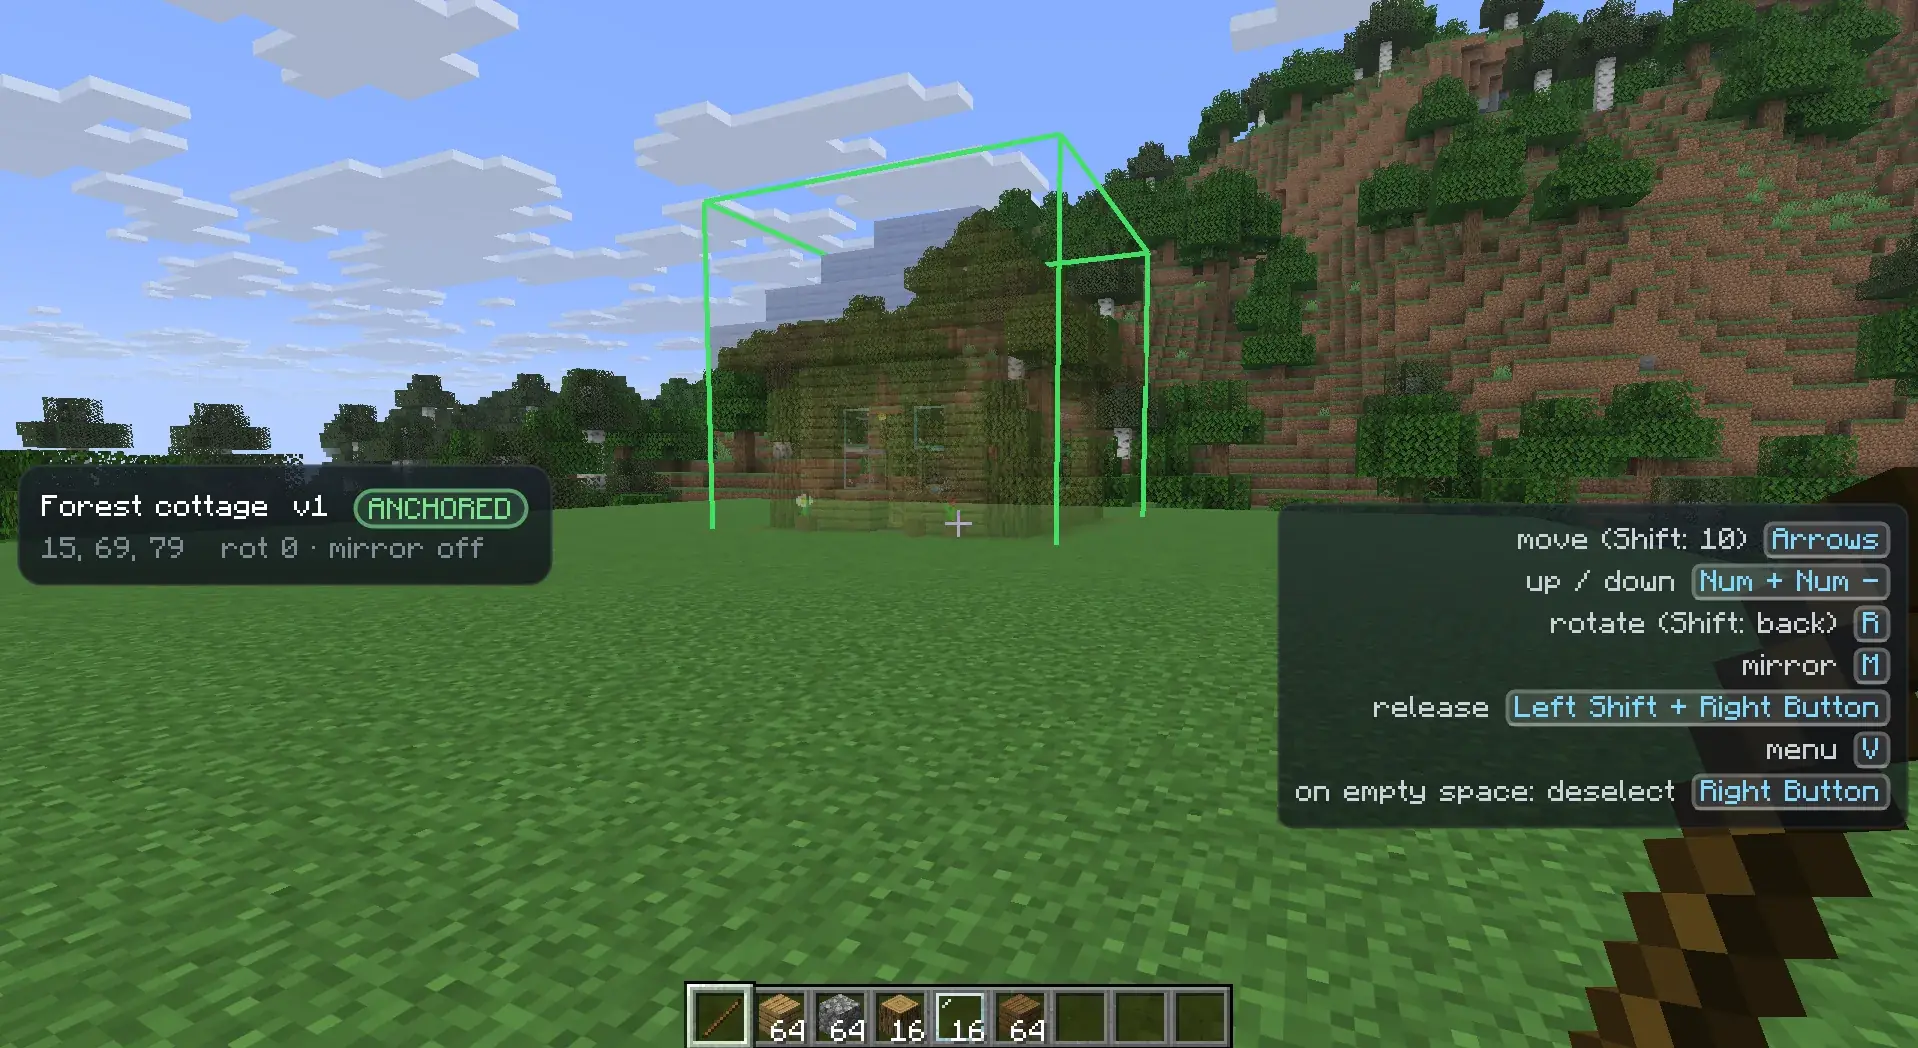
With the placement anchored, nudge it into place:
- The arrow keys move it one block, relative to where you look: ↑ away from you, ↓ towards you, ← and → sideways. Hold Shift to move 10 blocks.
- Numpad + and Numpad - move it up and down.
- R and M still rotate and mirror it.
- Sneak and right-click to pick it up again. It follows your crosshair until you right-click once more.
See Placing and moving for everything about moving, selecting and removing placements.
5. Lock it
Section titled “5. Lock it”When the position is right, lock the placement so it can’t move by accident:
- Hold V to open the placement wheel.
- Point the mouse at Lock and let go of V.
A locked placement starts comparing itself with the world. Blocks you have already built disappear from the ghost, and mistakes get coloured boxes. The panel shows your progress in percent.
6. Pick layers
Section titled “6. Pick layers”A big ghost is hard to build in. Show only part of it:
- Open the wheel with V and pick Layers.
- Pick From-to to show a fixed range of layers, or Follow feet to show the layers up to just above your feet.
- In From-to, ↑ and ↓ move the range and Numpad + / Numpad - make it taller or shorter.
On a locked placement these layer keys also work while you hold blocks instead of the remote. See Layers, including the in-hand filter that shows only the blocks you are holding.
7. Build
Section titled “7. Build”Now build in survival or creative as you normally would. Fetch the blocks you need: the wheel’s Materials opens a list of what is still short. See Materials.
Some helpers, all optional:
- Middle-click a ghost within reach to put its block into your hand.
- Easy Place: right-click a ghost with its item and the block lands exactly as planned.
- Creative paste: in your own creative world, paste the whole build at once.
8. Follow your mistakes
Section titled “8. Follow your mistakes”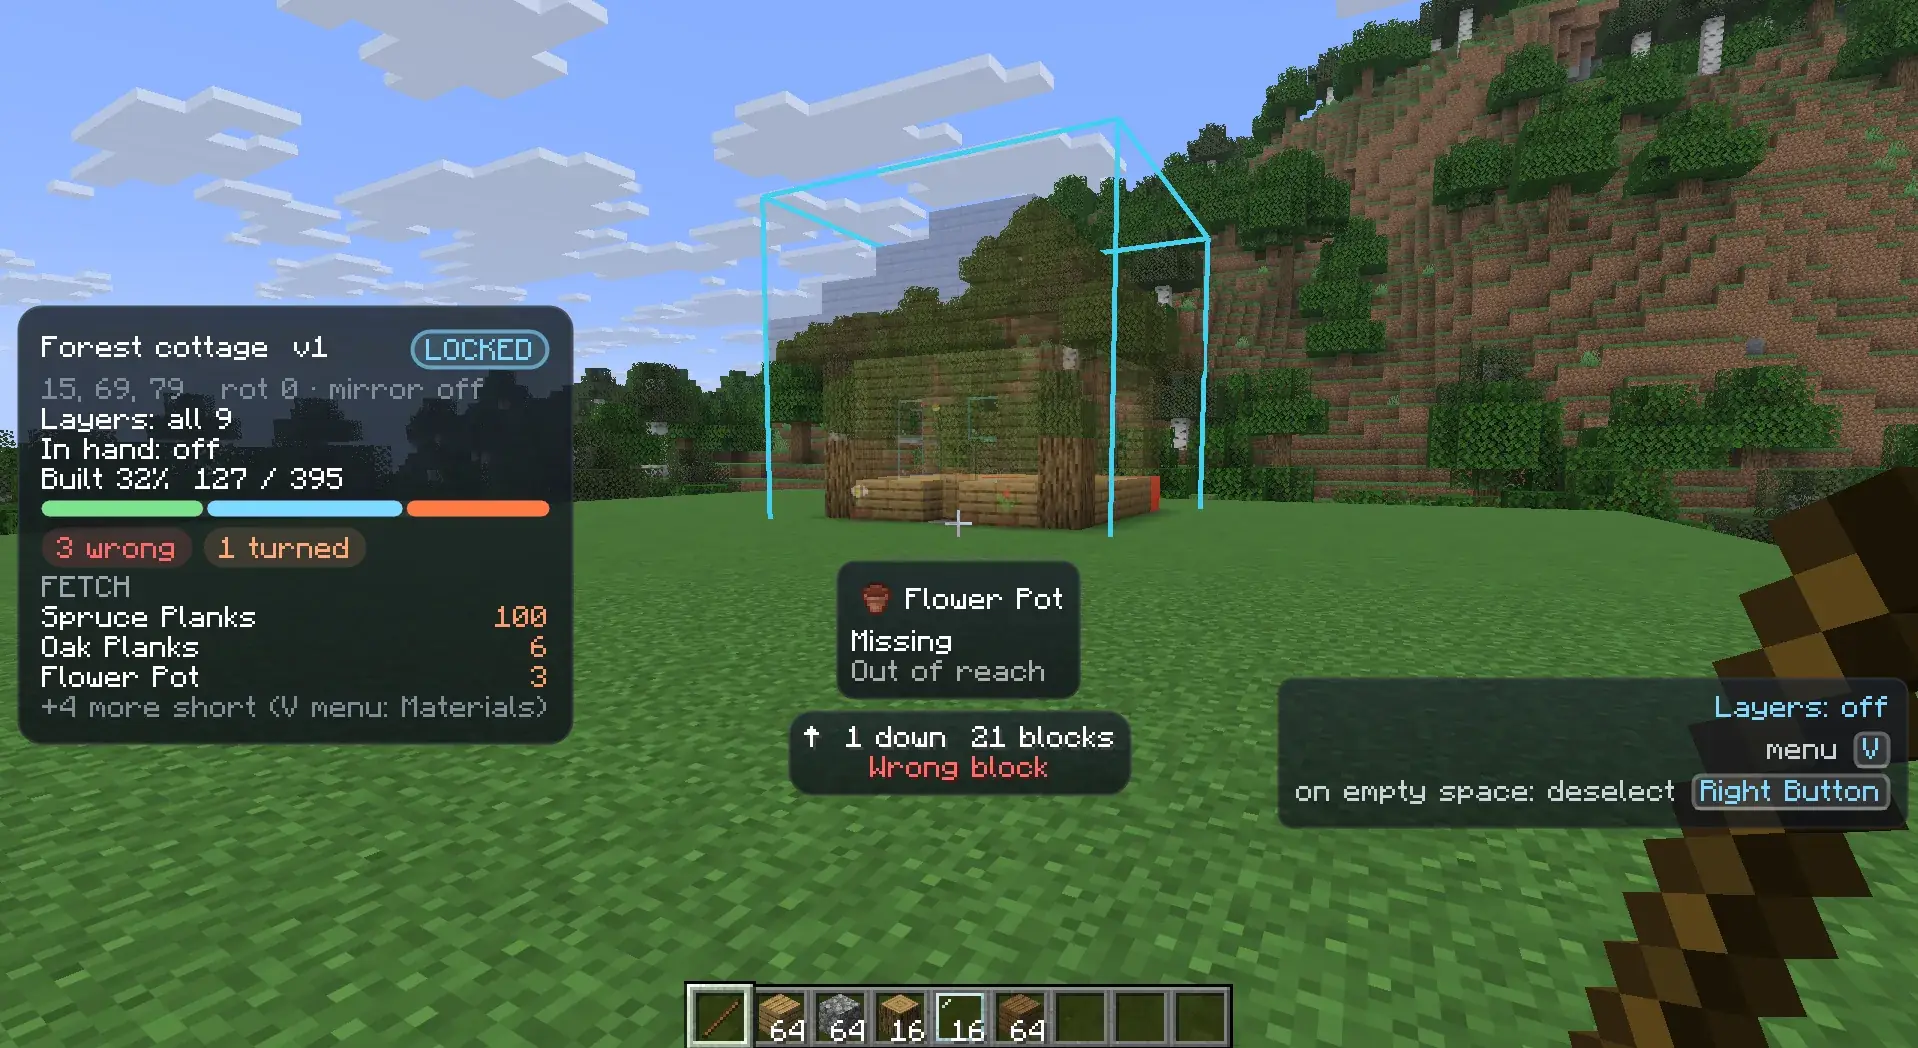
The locked placement marks every position that doesn’t match the plan:
| Box colour | Meaning |
|---|---|
| Red | Wrong block |
| Orange | Wrong orientation, too many, or not enough yet |
| Cyan | Wrong waterlogging |
| Yellow | Needs finishing, for example with a shovel or an axe |
| Magenta | Extra block where the plan has air |
Look at a ghost or a boxed block and a small HUD under the crosshair says what belongs there and what is wrong. To find the next mistake on a large build, turn on the mistake pointer: open the wheel, pick Options, then Mistakes. See World comparison.
9. Finish
Section titled “9. Finish”When every block matches, the placement finishes on its own: a sound plays, a toast names it, and the placement is removed. Changed your mind? Open the wheel within 10 seconds and pick Bring back to get it back, still locked.